I slightly modified this recipe, using tips from the comments and my own decorating flair. Here’s what I did:
Ingredients
1 cup butter, softened
1 cup confectioners’ sugar
1 egg
1 teaspoon vanilla extract
2 2/3 cups all-purpose flour
1 teaspoon baking powder
1 teaspoon salt
Green food coloring
3/4 cup whole almonds
1 (.75 ounce) tube red decorating gel
Directions
1. Beat the butter, sugar, egg, and vanilla extract together with an electric mixer; gradually add the flour, baking powder, and salt, continually beating. Fold in the green food coloring, adding enough that the dough turns pale green. Refrigerate the dough for 30 minutes.
2. While the dough is chilling, blanch almonds: Heat a pan of water to boiling, then boil the almonds for one minute. Drain. Once the almonds have cooled enough to touch, squeeze them out of their skins.
3. Preheat oven to 325 degrees F (165 degrees C). Lightly grease baking sheets.
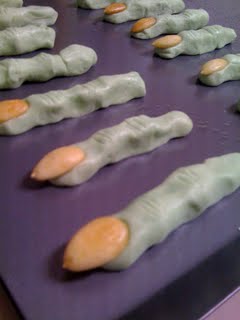
4. Remove dough from refrigerator in small amounts, allowing the rest to stay chilled. Pinch off enough dough for a ball an inch to an inch and a half wide. Roll the dough between your hands to form a finger shape. The spaces between your fingers will cause ridges to appear on the cookie. Lay the cookie on the baking sheet and mold it slightly to play up the look of a finger–slightly wider and taller at the knuckles.
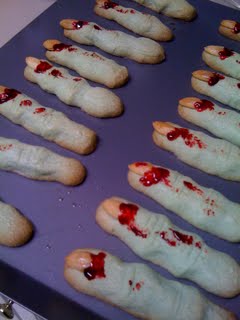
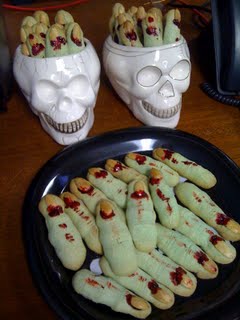
5. Press one almond into one end of each cookie for the fingernail. Adjust the “knuckles” so that they are proportional with the nail. Use a sharp knife to cut tiny lines on top of the knuckles to give the appearance of skin.
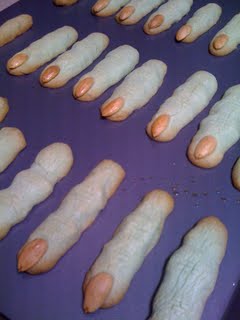
6. Bake in the preheated oven until the cookies are browned slightly, 20 to 25 minutes.
7. Paint around the almond “nail” with red gel while the cookies are still warm for a bloody effect. Then dab the “blood” with your finger, smearing it around and trailing it down the length of the cookie.